
Planting seeds rather than seedlings is a significantly cheaper option (if you think about it, for some vegetables you get about 6-8 seedlings for $2 or about 100 seeds for the same price), as well as giving you so many different heritage seeds to chose from. Even better, if you start saving your own seeds its virtually free, apart from a small amount of time and effort. This is truly sustainable gardening and way easier than it sounds.

I have had very limited success with planting seeds directly into my garden, I think its just the clay soil, its too heavy and the clods are too big, I also blame the slugs which have eaten baby seedlings to the ground before they get a chance to grow! Strangely though, things that I haven't planted intentionally keep sprouting up in odd places this year, like beans and tomatoes, so I don't know what I do wrong when I WANT to plant things! Anyway, this means that I mainly stick to planting in separate containers and transplanting into the garden. This gives me control over the soil, the water and shade for the seedling (as well as being more work as its something else to water). I did use the seedling trays from seedlings that I had bought previously, but I find them too shallow and they dry out too quickly. Since then I've been using big red tubs and planting into either toilet rolls or small pots. I keep some water in the bottom of the tubs so that the seed beds never dry out (even though this is supposed to cause root rot, I've had no problems with it). The toilet rolls can be planted directly into the garden, which is good for plants that don't like to have their roots disturbed by transplanting. For less delicate plants, I will plant a few in a small pot and then move them when they get too big.


I keep my seedlings under cover, because if it does rain, we can get 100 mL at a time, which can flood my tubs! And big rain drops can destroy tender seedlings. I tend to water with a watering can or with an old spray bottle, so that the seedlings receive a fine mist of water.


I have had very limited success with planting seeds directly into my garden, I think its just the clay soil, its too heavy and the clods are too big, I also blame the slugs which have eaten baby seedlings to the ground before they get a chance to grow! Strangely though, things that I haven't planted intentionally keep sprouting up in odd places this year, like beans and tomatoes, so I don't know what I do wrong when I WANT to plant things! Anyway, this means that I mainly stick to planting in separate containers and transplanting into the garden. This gives me control over the soil, the water and shade for the seedling (as well as being more work as its something else to water). I did use the seedling trays from seedlings that I had bought previously, but I find them too shallow and they dry out too quickly. Since then I've been using big red tubs and planting into either toilet rolls or small pots. I keep some water in the bottom of the tubs so that the seed beds never dry out (even though this is supposed to cause root rot, I've had no problems with it). The toilet rolls can be planted directly into the garden, which is good for plants that don't like to have their roots disturbed by transplanting. For less delicate plants, I will plant a few in a small pot and then move them when they get too big.

For larger seedlings, or small seeds where you just want to broadcast a whole lot of them, I use a large pot. I don't want to fill the entire pot with seed-raising mix, so most of the pot is compost, with a layer of seed-raising mix for the seeds to start off in. That means that the whole pot can hold moisture and provide some nutrients to the seedlings as they get started.

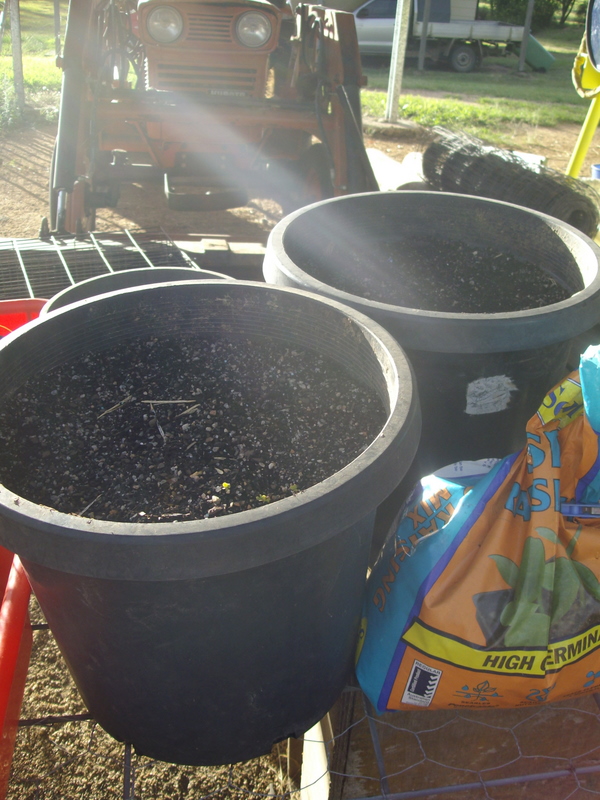
I do think its worth using a decent seed raising mix. I have tried to use compost instead, but I found that tomato seedlings appear in every pot! But I make that expensive mix go a bit further by using a layer of compost below the seed-raising mix in the larger pots and reusing the seed-raising mix after I transplant seedlings.

I keep my seedlings under cover, because if it does rain, we can get 100 mL at a time, which can flood my tubs! And big rain drops can destroy tender seedlings. I tend to water with a watering can or with an old spray bottle, so that the seedlings receive a fine mist of water.

When you have a seed-raising system organised, you can work out how many seeds to sow to achieve successive plantings and have fresh veges in our garden all year round. Its much easier to control gluts and famines if you are raising the seeds yourself instead of being limited to buying 6-8 seedlings at a time.
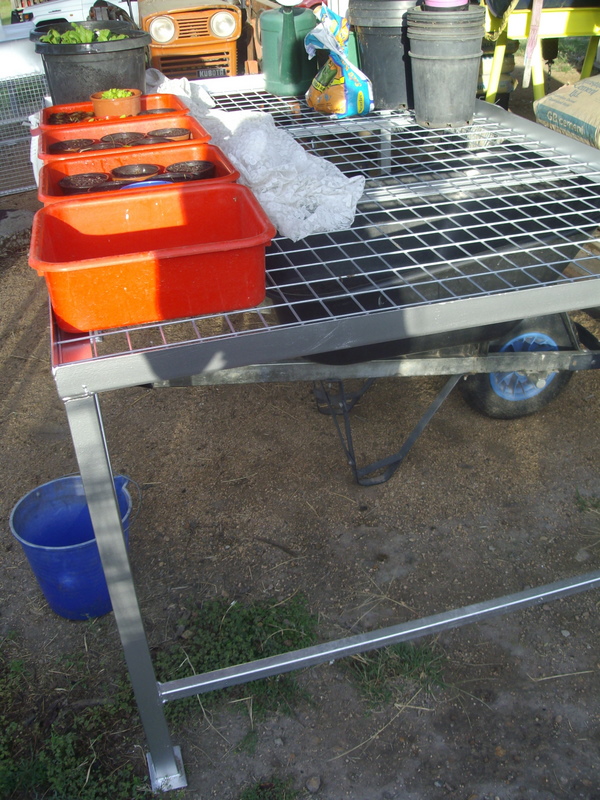
At first I made a seed raising bench from at old gate propped up on some old boxes, but then my fabricating husband came to the rescue and built me a lovely new table. Note also the old net curtain that I pull over the seedlings to stop the soil drying out and deter the birds.
See some other great tips for a cooler climate from Northwest Edible Life here.
Do you grow from seeds? Any tips?
It was funny reading this because you do heaps of the same things as me, but you've also made lots of improvements on my system that I'm now going to try next time.
ReplyDeleteI like the idea of using tubs so you can move everything around. This year I put all my little pots in a cardboard box to prevent them blowing over in the wind, but it went mouldy which is probably not ideal for growing new plants in.
GENIUS idea using compost down the bottom of a big pot and just using a bit of seed raising mix on top. See raising mix is so expensive, and you really do only need it to get the seeds started. I'm so stealing this idea.
I also like your spray mist bottle idea. My plants all get a bit drowned when I water them with a watering can.
I'm going to share this link on Facebook. It's too useful to keep to myself!
Bless you heaps,
Emma
Love this post! Turns out I do what you do, except no toilet paper rolls and I never thought to fill my containers with compost first and then a layer of seed mix! Brilliant stuff! :)
ReplyDeleteThanks, hope it helps everyone to stretch their seed-raising mix a bit further! And use up toilet rolls, love finding a use for something we normally throw out. I came to the spray bottle idea after drowning too many seedlings with the hose, it can take a long time to water if you have lots of seedlings though!
ReplyDeleteI think the use of compost in the bottom is a great idea. From some recent seedling experiments that I have been conducting I have found even high quality commercial seedling mix lacks the nutrition required for good plant growth. Adding compost is great start.
ReplyDelete