For several years I made yoghurt using my Esiyo thermos and the Esiyo packets. Then I started using powdered milk instead, which was cheaper and just as easy. And then we got Bella our house cow, so I started using real milk, not as easy, but more nutritious and just as tasty. I have also tried making coconut yoghurt, which is a great alternative to dairy. This is a summary of what I've learnt from all my yoghurt experiments to far.
What is yoghurt?
Yoghurt is the result of fermenting milk (dairy or otherwise) using bacteria (Lactobacillus delbrueckii subsp. bulgaricus and Streptococcus salivarius subsp. thermophilus bacteria. Lactobacillus acidophilus, bifidobacteria and Lactobacillus casei are also used for some yoghurts). The bacteria convert the lactose in milk to lactic acid, making it tangy, and also act on the proteins in milk, which causes it to thicken.
Ingredients for making yoghurt
All you need is some form of milk (powdered or liquid) and the starter cultures (either freeze dried or sub-cultured from another batch of yoghurt).
Forms of milk that can be used
- Powdered milk - this is the cheapest option, but there are some doubts about the effect of the drying process on the structure of the cholesterol in the milk, particularly full cream milk powder, so its probably not the healthiest option (I found one cup of powdered milk per litre of water made lovely thick yoghurt though).
- Pasteurised milk - if you don't have a cow, this is the next best option, go for organic and unhomoginised if you can (I haven't tried store-bought pasteurised milk yet though!).
- Raw milk - I have tried to use raw milk, and can't get it right, apparently is also depends on the cow's diet. I have given up and started pasteurising my fresh raw milk before I comake yoghurt.
- Coconut milk from a can or powdered form. Or other types of non-dairy milk.
The choice depends on your budget and your objectives. No matter how you make yoghurt, you'll still get the health benefits of the bacteria used as the culture. Even if you use powdered milk or pasteurised milk, which doesn't have all the benefits of raw milk, at least you're still getting those cultures to help your digestion.
Forms of starter culture
- Freeze-dried - can be ordered from the internet and kept in the freezer. A few grains are used to inoculate each batch of yoghurt.
- Sub-culture - a spoonful of yoghurt from another batch (or from bought yoghurt) can be used to inoculate a new batch. If everything is kept clean this can last for ages, but occasionally it can become contaminated and a new culture is required.
The Easiyo packets contain powdered milk and starter culture, so you just have to add water. They are more expensive than just using powdered milk, but very easy to use.
How to make the yoghurt
Once you combine your milk and starter culture, the mixture should be kept at about 40degC for about 12 hours. The time and temperatures are pretty approximate, if the yoghurt is a bit thin after 12 hours, just keep it warm for it a bit longer and see if it improves. I have found that the easiest way to keep the yoghurt at the right temperature is to use the Easiyo thermos (or any thermos that your jar fits into). I have seen many other methods using slow cookers, and thermoses and blankets and ovens, but this is so easy and was only about $20 for the thermos and the jar insert (or $2 if you can find one at the dump shop!).
How I make yoghurt with powdered milk
I either use a packet of Easiyo (which contains powdered milk and starter) or the powdered milk and a separate starter. This is the easiest method. All you have to do is mix up the packet or the powdered milk (plus starter) with room-temperature water in a suitable jar and put it in a thermos to stay at the right temperature for 12-24 hours. See a more detailed step by step post for using Easiyo here. And instructions for make yoghurt from milk powder here including how to sub-culture.
How I make yoghurt with liquid milk
I had a lot of trouble making yoghurt with raw milk, so first I learned to make to pasteurise the milk. You can use raw milk or bought liquid milk for this method:
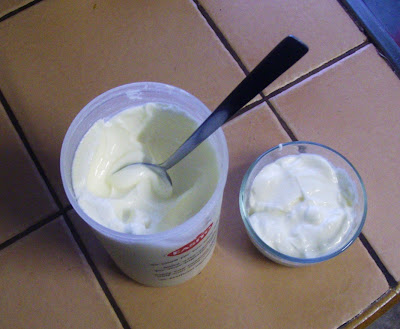
I heat 1 L of milk in a pot to 80degC and then let it cool to around 40degC. I then pour it into an Easiyo container, add a grain of yoghurt culture and put the container in the Easiyo thermos containing hot tap water. I usually leave it all day, or overnight, and then put the container in the fridge. Occasionally I get distracted and don't catch the milk at 80degC, and sometimes it even gets to a boil, its still ok to make yoghurt, but I find I get a lot of solids that sink to the bottom and can give an unpleasant texture (although I still eat it).
Usually the yoghurt isn't as thick as I would like. I guess its just the natural texture of yoghurt, and when I was making yoghurt using milk powder I was putting in extra milk powder to get a nice thick yoghurt and most bought yoghurts have some kind of thickener or extra milk solids added, so this thin yoghurt seems a bit thin compared to what I'm used to. Actually the constancy reminds me of McDs thick shake! And I haven't had one of them for a LONG time, so I don't mind it. If that's too runny for you, you can always strain it to remove some of the whey, but then you lose some of the goodness! I don't like to waste that whey, so I'd rather just slurp up the yoghurt and pretend its a healthy thick shake.
How I make yoghurt with raw milk
If you haven't tried making yoghurt, its really very easy, just invest in a thermos and you'll have no trouble.
Do you make yoghurt? What method do you use?

Comments
Post a Comment
Thanks, I appreciate all your comments, suggestions and questions, but I don't always get time to reply right away. If you need me to reply personally to a question, please leave your email address in the comment or in your profile, or email me directly on eight.acres.liz at gmail.com